Published On Jun 3, 2018
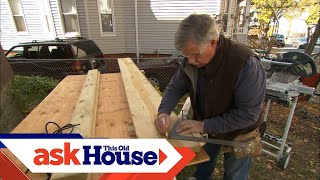
Ask This Old House general contractor Tom Silva and host Kevin O’Connor build a console table using a maple slab with a live edge on it.
SUBSCRIBE to This Old House: http://bit.ly/SubscribeThisOldHouse
Time: 2 days
Cost: $300
Skill Level: Moderate
Tools List for Building a Live Edge Slab Table:
Track saw
Hammer
Chisel
Grinder
Palm sander
Clamps
Router
Drill
Shopping List:
Live edge slab
Hairpin legs
80-120 grit sandpaper
320 grit sandpaper
Wood glue
Scrap wood to use for rails and jig
Wood screws
Cheap paintbrush
Rags
Amber shellac
Tung Oil
Steps:
1. Before doing any work, determine the orientation of the table. Decide whether the live edge should face up or face down, see which face of the slab will look nicest on top, etc. For decorative tables, Tom likes having the live edge face up so it can be really celebrated. For more functional tables, like a dining room table, Tom likes the live edge down so there’s no gap between the flat surface of the table and the person sitting at the table. Mark the sides in the middle that will need to be cut.
2. Lay the slabs on a workbench with the sides you plan to cut facing the outside of the table. Cut straight edges on both sides of each slab with the track saw.
3. Put the slabs back in the correct orientation to check the size.
4. Remove the bark from the live edge using a hammer and chisel.
5. Once the bark is off, smooth out the edges with a grinder.
6. Sand the live edges with the palm sander. Do a few passes, starting with the rough sandpaper and work up to a smoother one.
7. Generously apply a coat of wood glue to both straight edges of the slabs and clamp the pieces together to dry.
8. Once the glue has dried, cut the rough edges on the short sides of the table with a track saw.
9. Sand the top of the table until the glue joint is perfectly blended.
10. Flip the table upside down and mark the desired location for the legs.
11. Cut two pieces of scrap wood to equal size and height and clamp them to the workbench around the tabletop.
12. Make a jig using the scrap wood to hold a router that’s wide enough to slide across the two rails.
13. Determine the appropriate depth to set the router by placing the jig over the four marks for the legs. Lower the router to the deepest point on the four marks.
14. Use the router to cut out four even sections based on the marks.
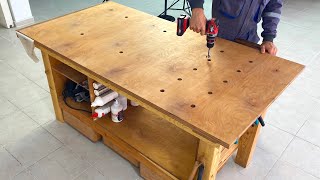
15. Drill holes in the table for the four legs. Then, screw the legs into the drilled holes with the wood screws.
16. Flip the table right side up on its legs. Apply a coat of amber shellac with the paintbrush to seal it. Let the shellac dry.
17. Lightly sand the table with the 320 grit sandpaper.
18. Apply three coats of tung oil to the table with a rag. Be sure to put the rag in a bucket of water when you’re finished. Let it dry overnight.
19. Apply three more coats of tung oil.
Resources:
Tom recommends locating a local lumber yard or mill to find live edge slabs. A quick Internet search should help you identify the one closest to you. Give them a call, talk about the project you’d like to do, and see what types of wood they have. Tom and Kevin used a slab of maple from The Rustic Wood Shop (https://therusticwoodshop.space/).
For a more modern look, Tom ordered hairpin metal legs to attach to the bottom of the table. He used the 48” I-Semble Hairpin Table Legs, available at Rockler Woodworking and Hardware (http://www.rockler.com/).
To adhere the two boards together, Tom used wood glue, manufactured by Gorilla Glue (https://www.gorillatough.com/).
Build It:
This Old House general contractor Tom Silva, This Old House host Kevin O’Connor, and special guests including Jimmy DiResta, take you through step-by-step DIY projects in this popular video series. From end-tables to cutting boards to wine racks to chicken coops and more, learn how to build from the best pros in the game. Segments include mention of all tools and materials needed to get the job done.
Looking for more step by step guidance on how to complete projects around the house? Join This Old House Insider to stream over 1,000 episodes commercial-free.
https://bit.ly/2GPiYbH
Plus, download our app for streaming full episodes to your connected TV, phone or tablet:
https://bit.ly/34RYEP5
Follow This Old House and Ask This Old House:
Facebook: http://bit.ly/ThisOldHouseFB
Twitter: http://bit.ly/ThisOldHouseTwitter
http://bit.ly/AskTOHTwitter
Pinterest: http://bit.ly/ThisOldHousePinterest
Instagram: http://bit.ly/ThisOldHouseIG
http://bit.ly/AskTOHIG
For more on This Old House and Ask This Old House, visit us at: http://bit.ly/ThisOldHouseWebsite
Live Edge Slab Table | Build It | Ask This Old House
/ thisoldhouse