Published On Feb 26, 2017
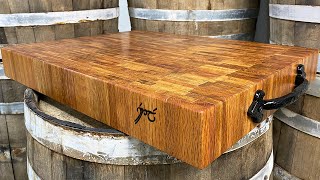
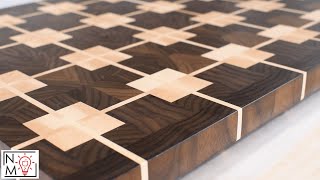
Ask This Old House general contractor Tom Silva and host Kevin O’Connor create an end grain cutting board from heart pine scrap wood
SUBSCRIBE to This Old House: http://bit.ly/SubscribeThisOldHouse
Time: 4-5 hours
Cost: $20 (if scrap wood is used)
Skill Level: Hard
Tools List:
Surface planer [https://amzn.to/34v0sNl]
Table saw [https://amzn.to/2Uyg0LF]
Clamps [https://amzn.to/2ZC0tAg]
Miter saw [https://amzn.to/2zZbqMY]
Cutting track [https://amzn.to/2PQGYPT]
Circular saw [https://amzn.to/2zWYuY0]
Router [https://amzn.to/34lEM62]
Round over router bit [https://amzn.to/2LuU1Bc]
Cove router bit [https://amzn.to/2Lv5Irt]
Power sander [https://amzn.to/34Dgo02]
Shopping List:
Wood glue [https://amzn.to/2zYr3V2]
Paint brush [https://amzn.to/34qPSXu]
Mineral oil [https://amzn.to/2ZE2prJ]
Steps:
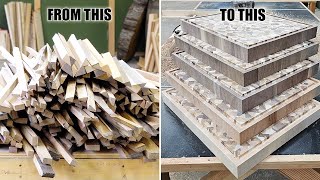
1. Choose scrap wood that’s at least 2x12. You may end up using 2-3 pieces of scrap wood.
2. Use a surface planer to ensure all pieces are a consistent thickness. This is a loud machine, so wear hearing protection.
3. Use the table saw to rip the board into 2” strips.
4. Realign the boards back together for gluing. Before gluing, flip the boards to alternate the grain, avoiding warping.
5. Flip the boards once and use wood glue to make a line across each board.
6. Use a paint brush to fully coat the board with the wood glue.
7. Flip each board back and push the glued surfaces together. Clamp the boards together to allow the glue to set up. Wipe down any excess glue on the surface. Let it dry for at least two hours.
8. Unclamp the boards.
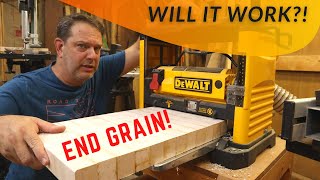
9. Run the glued assembly through the surface planer again to make sure each board is even and flat. It may take several passes on each side.
10. Put a stop on a miter saw 2” from the blade to ensure each cut is exactly the same.
11. Square up the end of the assembly with a thin cut using a miter saw, then make the 2” cuts using the stop.
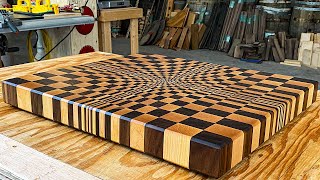
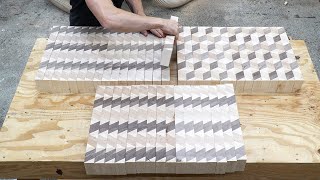
12. Flip the boards so the end grain is visible.
13. Realign the boards and mix up the end grain pieces so it’s not a uniform pattern. The joints should also be staggered.
14. Flip each board on its side and put on another layer of wood glue. Once again, use a paint brush to even out the coat of glue.
15. Flip each board back to ensure the end grain is on top.
16. Clamp all of the boards together along with two scrap pieces of 2” x 4” on each end. These scrap pieces will prevent chipping on the suface planer later.
17. Wipe away any excess glue. Let it dry for at least two hours.
18. To square up one side, use a cutting track and a circular saw.
19. With one side straight, true up the opposite side with a table saw.
20. Run the board back through the surface planer, taking off just a small amount each time to flatten out the board. The 2” x 4” on the ends will prevent chip out.
21. Using a miter saw to cut off the extra 2” x 4” attached to the edges.
22. Using a router and a round over bit, round off the four edges of the board.
23. Using a router and a cove bit, add an edge detail around the entire top and bottom portion of the board.
24. Sand all sides using a power sander until smooth.
25. Use a food grade oil such as mineral oil to coat the board. It will take several coats of oil to fully penetrate the grain, and the oil should be reapplied occasionally as needed.
Heart pine is only available from reclaimed and salvaged sources. For this project, it was originally purchased from Longleaf Lumber [https://www.longleaflumber.com/].
To glue the boards together, Tom used wood glue from Gorilla Glue [https://www.gorillatough.com/].
Tom used a roundover router bit to ease the corners and a cove router bit to dress the edges of the cutting board. These bits are available at home centers and woodworking supply shops.
Build It:
This Old House general contractor Tom Silva, This Old House host Kevin O’Connor, and special guests including Jimmy DiResta, take you through step-by-step DIY projects in this popular video series. From end-tables to cutting boards to wine racks to chicken coops and more, learn how to build from the best pros in the game. Segments include mention of all tools and materials needed to get the job done.
Looking for more step by step guidance on how to complete projects around the house? Join This Old House Insider to stream over 1,000 episodes commercial-free.
https://bit.ly/2GPiYbH
Plus, download our app for streaming full episodes to your connected TV, phone or tablet:
https://bit.ly/34RYEP5
Follow This Old House and Ask This Old House:
Facebook: http://bit.ly/ThisOldHouseFB
Twitter: http://bit.ly/ThisOldHouseTwitter
http://bit.ly/AskTOHTwitter
Pinterest: http://bit.ly/ThisOldHousePinterest
Instagram: http://bit.ly/ThisOldHouseIG
http://bit.ly/AskTOHIG
For more on This Old House and Ask This Old House, visit us at: http://bit.ly/ThisOldHouseWebsite
End Grain Cutting Board from Scrap Wood | Build It | Ask This Old House
/ thisoldhouse