Published On Oct 20, 2023
How to install RGB lighting. This could be done to your vehicle, space in your home, shop, rv, or in this case I’m installing this in a boat. This will also be broken up into 3 zones which I'll show further on in the video.The zones can only be switched on or off and not have the colors or modes individually controlled. There is a bunch of various mode where I can I can keep one color as a solid, have it strobe or flash at different speeds, alternate between two or multiple colors, and even have the lights react to the beat of the music. The lights make the white surface glow nicely at night without making over bright areas despite having a lights in specific areas. #ledlights #rgblighting #boating
Website: http://4diyers.com
Patreon: / 4diyers
Facebook: / 4diyers
Twitter: / 4diyers
Instagram: / 4diyers
Tumblr: / 4diyers
Pintrest: / 4diyers
Tools/Supplies Needed:
-soldering iron
-wiring
-fuse panel with fuses
-RGB module
-RGB lighting
-drill and drill bits
-heat shrink
-cable ties
-crimp connectors
-wire strippers/crimpers
-switches
Procedure:
First was determining where I wanted a new fuse panel. The boat does have a factory fuse panel, however it’s on the driver’s side of the boat and isn’t large enough for the extra stuff I want to add. So instead I purchased a new panel, the factory panel will be replaced eventually too. I have a piece of aluminum bent up to stay hidden in the cuddy cabin, this is cut to length on the mitre saw.
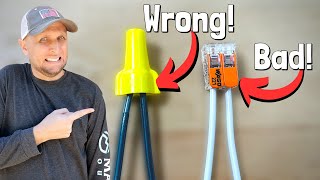
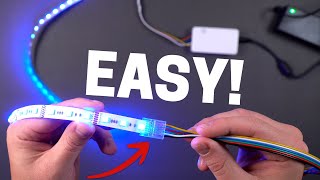
Most of the lights are hooked up in pairs, and two of the pigtails for the lights connect to a four conductor wire, everything is color coded so it’s easy to follow. Black connects to black, this is the main power and switching wire. We cannot use red, green, or blue as a switching wire because this will only change the color and not disable the LED.
Moving onto the wiring for the switch panel. These are illuminated switches, I’ll wire these up so they illuminate when the circuit is active. Once the circuit is activated, the red LED ring around the switch will illuminate. These switches have two circuits, a normally open and a normally closed. To make everything cleaner, I removed the normally closed wire as it won’t be used. For these particular switches, they had a wiring diagram posted on their website. To remove the pin, I used a very small screwdriver to disconnect the pin and then pulled the wire out from the backside. For this I’m using my OEMTools 22560 precision screwdriver set that comes in a set of six, made from chrome vanadium steel, and magnetic tips. A link to these from Mobile Distributor Supply will be included in the video description.
A heavy gauge power and ground wire are ran to the new fuse panel. I didn’t tap into the existing power and ground wires in the cuddy cabin as they’re on the opposite side and there’s no clean way to route them from one side to the other. These wires are taped together about every foot and they’re then installed in split loop casing as protection.
I made a fully custom switch panel out of 3/16” thick aluminum. The width and height do vary depending on which style you’re using, along with what other options you’re adding. Being that my boat is older and before USB charging, I also purchased a USB charging port and a 12v auxiliary port. The tape was used to make an easy layout. Washers work great if you can match them with your switch diameter size. Make sure you have enough room in behind for however they’re fastened and for the wiring.
Drilling the holes can be a bit tricky in a boat. I have found it’s hard to make reference marks as referring to fixtures aren’t always symmetrically placed and even the boat isn’t 100% square. I did my best to make reference marks for hole placement, the lights have the same locations on the left and right sides of the boat. This is fiberglass so I would highly recommend wearing a mask when drilling.
Some other accessories I also added were a 12v cigarette lighter style port to operate my fuel pump and possibly an air pump. A USB charger and digital volt meter were installed, a power switch for the radio to reduce the chance of a parasitic draw, underwater transom lights in the drain plugs, new cuddy cabin lights with a dimmable switch, and an extra switch for a fan which will be installed in the future.
Thank you to all those who watch my videos and support my content. Don't forget to subscribe to my channel for future tutorial videos and like my video if you found it helpful. New videos are always being uploaded every week!
© 4DIYers 2013
All Rights Reserved
No part of this video or any of its contents may be reproduced, copied, modified or adapted, without the prior written consent of the author.