Published On Apr 19, 2024
4-player Coop Helldive, Max Difficulty Lvl 9, all objectives (Main + Optional) completed, all nests destroyed
Modifiers: Tremors
Planet: Fori Prime
Patch version: 1.000 203
With so many converts to the Quasar Cannon, I thought it'd be nice to shake off the rocket ring rust and revisit the old reliable Recoilless Rifle and see how it fares today. With a hard target specialist as my support weapon, I'm adding Eagle Clusterbombs to my arsenal for some amazing trash clear, with the Knight SMG keeping the rest of the bugs off me even while carrying the SSD.
Thanks to my teammates on this one: Specter (@originalSPECTER), Tiberius, and Nuke144!
______________
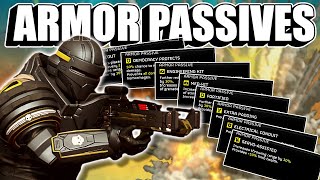
Build:
While the Recoilless does sacrifice a backpack slot, this isn't a big issue if you're intending on taking 3 Red Stratagems anyway. What you do get for it though is an accurate and instant fire weapon, able to instantly react to Chargers - and unlike the EATs, if you get a teammate to reload for you, you can really go ham on targets, making short work of groups of Chargers or Shrieker nests. I've read different comments saying it's impractical to expect teammates to carry your backpack the whole game - I agree, which is why it's easier to simply drop your backpack when you need the team reload, or better yet drop them your 2nd Recoiless Rifle a few minutes into the mission.
With the Recoilless taking care of Chargers, and the good old 500kg taking care of Bile Titans, we could do with a little more crowd clear ability, particularly for swarms of medium enemies like Hive Guards, Brood Commanders and Bile Spewers, which might take too long with just your primary weapon. While Eagle Airstrike does this pretty well, Clusterbombs allow you to be a little more liberal with your strikes, having 5 uses per rearm, letting you keep your Airstrikes for groups of heavily armoured targets or nests instead. With 3 Eagle strikes sharing one rearm, don't be afraid to use your strikes - the worst thing would be to hold off on starting the cooldown for the majority of your strikes because you have one Cluster remaining.
As this is a Data Recovery mission, I've gone with the Knight SMG for carrying the SSD - while this thing has huge recoil, this is less of an issue with the bugs who like to get up close and personal, and the Knight makes up for it with some great burst DPS. A recoil armour could do well here, though I went with Hero of the Federation, for fashion over anything else.
With no real need for stun nades for Charger kills, I've gone with Impact nades for closing bug holes as well as nuking Spewers in a pinch - if you wanted even more nade spam you could bring the Grenade Pistol for closing holes, though I went with the Redeemer as another option up close.
All in all, I'm pretty satisfied with this build - while I need to brush up on my Charger headshots, Eagle Clusterbombs were a revelation in dealing with huge trash mobs in ways my primary or support could not. Just watch that friendly fire and callout your strikes...
_______________
00:00 Intro
00:15 Power Generator, SEAF Artillery, Nest 1, Shrieker Nest 1 / Eagle vs Bug
05:00 Radar, Hard Drive, Nest 2 / Double Titan Action
13:30 Nest 3, Shrieker Nest 2, Upload Data / Double Double Titan Action
26:50 Nest 4, Escape Pod, Extract / Danger Close
33:05 Mission Stats