Published On Jun 25, 2022
►► Watch my FREE WEBINAR here: My Top 10 Tips for making your passion project on a budget https://www.diymoviemaking.com/pl/214...
►► Check out my courses and learn how to make your best film on a budget at https://www.diymoviemaking.com/
🔥 Instagram: @diy_moviemaking
🔥 Facebook: @diymoviemaking
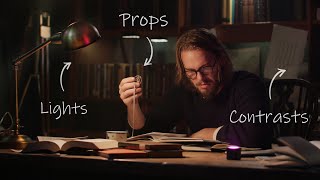
Steve Ramsden here with DIY Moviemaking and this week I’m going to show you how to easily and cheaply light a dramatic interior night scene, to really add some production value if you are working on a budget. I’m always telling people that the camera you use to make your film matters much less than lighting your scene properly, which will make ANY camera look better!
Lighting kit used:
- Neewer light panels: https://www.amazon.co.uk/gp/product/B...
- Light stands: https://www.amazon.co.uk/gp/product/B...
- Aputure C300D II light: https://www.aputure.com/products/ls-c...
- CTB gel: https://www.leefilters.com/
In this scene we have a dramatic conversation between two actors on a recent short thriller I directed. Our lead actor was film and TV star Guy Henry (Tarkin in Star Wars Rouge One, Pius Thicknesse in Harry Potter) .
For our main lighting in the room on the actors, I did this entirely by just using a set of three fairly cheap LED light panels, and that’s why I think having a kit of these is so useful no matter what level you are at. It also means you can start having a go at ‘three point’ lighting’ when lighting actors, and then add or take away the lights depending on what you want.
I got this particular kit from Neewer, but for beginners I think really any similar set is fine as long as the panel lights have adjustable dials for both brightness, meaning you can dim them high or low) and colour temperature, meaning you can get cooler or warmer looking light.
For the key light, meaning our main light on the actors, I wanted a soft glow on our main character’s face as if from a table lamp just out of shot by the window. For this, I’ve found if you have an LED panel with some barn doors on it, you can make a pretty good cheap soft box by just adding something as some diffusion over the front. I got this diffusion sheet from another lighting kit, but you could make your own by just using something like tracing paper. And you could even just use a household lamp for a key light, with something diffusing it. Remember, nobody will see the kit you are using off camera, so experiment with cheap lighting solutions before you spend a fortune on anything more professional!
So, I placed this soft key light off to the opposite side of Guy, and this meant that the camera was more on the shadowy side of the face, which I recommend for most kinds of films as it normally looks more dramatic.
Next, for a backlight I used the second LED panel and raised this up on a stand and tilted it down. This one didn’t need much diffusion and could be a bit harsher, although in the end I did add some to this light as well. This was really just to pull the character away from the background and add a nice hair-light around the side of the face and shoulder.
I found I didn’t actually need the third light panel in this setup, as I didn’t think the scene needed a fill light, and we also had a big sound blanket nearby anyway to make the room less echoey, and this was already bouncing enough light back into the shadows.
Finally I decided that the background was a little uninteresting, so I simply shone a desk lamp up at the back wall to pick out the brickwork texture.
Next I needed to light the garden. I started by switching on two practical lamps which were on this shed, which immediately made a much more interesting background as they would be nice and blurry behind our character. Then I wanted to use something to act as “moonlight” to make the rest of the garden visible. But I wanted to keep this light under some cover. In the end the best solution was to shine a light out of the upstairs window of the house, and this did a great job of illuminating the garden while also staying dry. For this I used my Aputure C300D Mark II light with some CTB (or Color Temperature Blue) gel which made it look cooler.
All the lights in the room were set on tungsten colour temperature, and so I set my camera to this as well. This made the interior look warmer in contrast to the garden outside, which looked much colder thanks to that blue-looking moonlight.
So you can always use this lighting plan as a starting point and just add or take away any of those lights when trying your next dramatic film project. Hopefully you found this useful and just let me know below if you’d like to see more lighting tutorials like this for my short films.
And if you want to learn how to make the best film you can right now on a budget, you can of course check out my full courses at DIYmoviemaking.com or via the links below. Happy moviemaking and I’ll see you next time!