Published On Jul 31, 2023
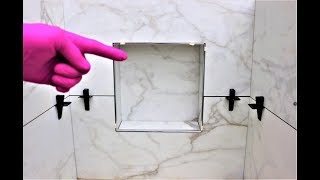
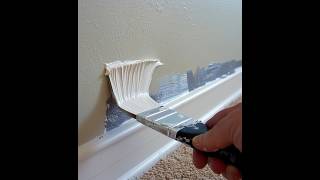
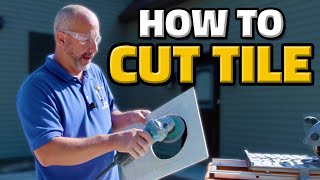
This is how to cut tile around a curved wall.
SUBSCRIBE https://www.youtube.com/c/MarkShows1?...
Amazon GIFT FINDER https://amzn.to/3rQ6s3p
#TileTips #TileHacks #TileCuts #RoundWall
Video transcript (what I said in the video): this porcelain tile is 9x48 (inches) and we have to make this cut here around the curvature of the wall first step is to cut this tile to the size that we have from here to that corner which is about 38 and 1/8 so I already measured and made the mark so let's cut this I'm using this Sigma to cut it I line up the line there that's it we have our cut and we place the tile over the next row perfectly aligning you see with the grout line it's perfectly aligned so this tile is just sitting on top of this row and also here I place the tile here as if we already have a grout line between that tile and this tile and then I took a measurement from there to the wall and I transferred it here and then I also took a measurement from here to there and transferred it from here to here so basically this line I marked is the corner the wall there how do we transfer the exact curvature of the wall on the tile we know that this point here this is here right if you take a piece of tile same width as tile if you take one of these and put it here see from the wall you realize the line is right there at the end of the tile so what I came up with I taped a pencil to a piece of tile piece of tile being same size from here to here right so let me see if I can do this with one hand I always have to keep this parallel to this line to this grout and perpendicular to that 90 degrees I cannot go like this or like this and always touching the wall and following that so let's see what I can achieve I can take the Sharpie now and mark over the pencil and then cut the tile and hopefully this will fit perfectly in there I use the plunge feature of the wet saw and I move the tile around this way and I scored the line see it's all it's all scored here and then here I plunged it completely so this is cut through and now I'm going to cut the tile here on this line and then on another line like half an inch in up to here and then I'm gonna clear that corner so it looks rounded see so I made one cut here and then I kind of continued making this cut so I broke off that piece I'm gonna make some more cuts here maybe try to put the blade a little deeper here and then try to break off each piece and then I already made a couple of cuts here and I eliminated this piece I cut all these slivers just kind of put pressure here see but I find it's better if I hit it with something like this all of them are broken and I'm just gonna shave this and these two so it's all done this is how it looks let's see if I can put it in using just one hand let's try here first okay okay and it looks pretty good to me pretty good there you go and if you think this is a too big of a gap it's not so much because the drywall is missing down there so looking from above you see it's perfect looking from here the drywall is missing a little bit in order to check to be even more accurate take a piece of tile the baseboard is going to be thicker than this but I'm taking a piece of tile as if this was the baseboard and I'm dropping it down see but if this piece of tile covers perfectly here see then a piece of baseboard will definitely cover so it's not not too big of a gap it's just that the drywall doesn't go all the way down see I can stick my finger in there there you have it beautiful so now mix thinset and install the piece of tile and then use these wedges these wedges go here and uh they go all around in this there are too many these are too many but that's because they are under here stuck in the thin set under here um and sometimes they break so I put three instead of two here same there 3 instead of 2 just to have enough in case one breaks 24 hours later after this tile was installed I usually just take a hammer which is kind of risky you got to be careful not to hit the tile I hit here at the top I don't hit on the bottom I don't touch the tile I do this see they pop out or I do this like this okay like that like that and that's it these wedges are usable and these are garbage and the bottom part of these it's buried deep down there under the tile forever it's gonna be covered with grout
As an Amazon Affiliate, the Mark Shows channel earns from qualifying purchases.