Published On May 1, 2015
PLEASE READ THIS VIDEO DESCRIPTION FOR DETAILS:
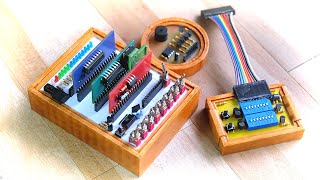
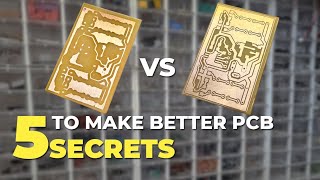
Here, I make a control unit for creating chaser animations for my various electrical projects. It's composed of two circuit boards, one that handles the logic and another to control the high-voltage loads. The full circuit is programmed with numerous animation patterns, the speed and brightness of which can be adjusted with a control panel.
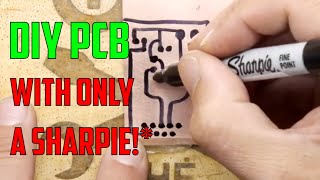
Note: This video is not intended to be a tutorial. To learn the ins and outs of making PCBs at home, Google "PCB toner transfer method." However, I have included some notes below. If you have a question, I'm happy to answer it in the comments if it hasn't already been answered here.
PATREON EXCLUSIVES
If you'd like to help support my channel and get access to exclusive content, visit / wesleytreat .
FOLLOW ME
▶ Instagram: / wesley_treat
▶ Facebook: / satelluxe
▶ Twitter: / wesleytreat
▶ Amazon: https://amazon.com/shop/wesleytreat
▶ Etsy: https://satelluxe.etsy.com & https://satelluxestudio.etsy.com
TOOLS & MATERIALS FEATURED IN THIS VIDEO
(MORE DETAILS BELOW)
▶ Autodesk (formerly CadSoft) Eagle: https://goo.gl/EMM1YT
▶ HP Glossy Premium Presentation Paper (CG988A): (Apparently, this is no longer produced. If you find a good alternative, please let everyone know in the comments.)
▶ Pulsar Toner Transfer Paper (Somewhat easier alternative to the HP Glossy, recommended for beginners): http://amzn.to/2s0WJpQ
▶ MG Chemicals Copper Clad Board: http://amzn.to/2s8UDVK
▶ ClassicCut Ingento Paper Cutter 1152 (New version): http://amzn.to/2s9bFmB
▶ Goof Off Professional Strength Remover: http://amzn.to/2raI5II
▶ White Cotton Gloves, Medium: http://amzn.to/2s8Pk8O
▶ White Cotton Gloves, Large: http://amzn.to/2s17cBE
▶ 250mL Graduated Cylinder: http://amzn.to/2s1hnGi
▶ Proxxon FBS 115/E Precision Rotary Tool: http://amzn.to/2rGeL0a
▶ Proxxon Drill Stand MB 140/S: http://amzn.to/2s1azsk
▶ Weller WLC100 Soldering Station: http://amzn.to/2sIaUxV
▶ Husky 6-Piece Mini Pliers Set: http://amzn.to/2sZ17ml
▶ Arduino Uno R3 (Replacement model to my Duemilanove): http://amzn.to/2s1qM0O
▶ USBtinyISP V2 AVR ISP Programmer (Newer model than mine): http://amzn.to/2s1yzvB
▶ Techspray Fine-L-Kote HT: https://goo.gl/nNMcBq
▶ Smooth-On Mold Star Silicone 15 Slow, Trial Unit (See below for more info): http://amzn.to/2sIf1Kz
▶ Smooth-On Smooth-Cast 320 Resin, Trial Unit (See below for more info): http://amzn.to/2rGq2gG
OTHER NOTES
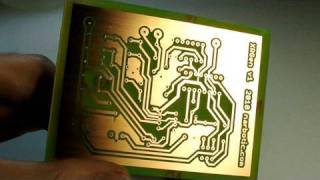
▶ I design my circuit boards in Autodesk Eagle and print the final layup from Adobe Illustrator.
▶ The sanding is to remove surface oxidation on the copper-clad board. As you might be able to tell, this particular stock had been sitting for quite a while and had become pretty cloudy.
▶ The laminator I use is GBC's Personal Laminator, model 1701987. It's no longer manufactured, but you can find a current, recommended model at http://www.pcbfx.com/main_site/pages/.... This is where I was led to the GBC I use, which I've been very happy with for a number of years.
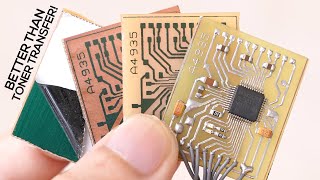
▶ I use an HP LaserJet HP1102w in this video, but most laser printers will work. (The toner in Brother printers is generally reported not to give good results, however.) Will your specific printer work? I don't know, since I don't have one to test.
▶ I wear cotton gloves once I begin cleaning the copper-clad board (a) to avoid contaminating it with oils before applying the toner mask, and (b) because the boards get pretty hot coming out of the laminator.
▶ I use Goof Off Professional Strength Remover to clean the boards and to remove the toner, but regular acetone works, too.
▶ The etching solution is 2 parts hydrogen peroxide (available at any drug store) and 1 part muriatic acid (available at nearly any hardware store).
▶ The toner mask sometimes looks white because, with the HP paper I use, a thin layer of paper sticks to the toner. It appears lighter or darker depending on lighting and moisture.
▶ The "silk screen" on the top is added simply by using the same toner-transfer process.
▶ The red thing with all the holes in it is a homemade fume extractor.
▶ I program the microcontroller using an Arduino Duemilanove (see above for newer model) through the USBTiny ISP Programmer (see above for newer model). Note: I cannot provide support for these items.
▶ The spray I coat the circuit boards with is Techspray's Fine-L-Kote HT, a conformal coating that prevents oxidation. It can be soldered through if necessary.
▶ I created the original circuit box from modeling styrene, then molded it using Smooth-On Mold Star silicone. The cast is made with Smooth-Cast 320 resin. Casting a box is a little pricier, but saves loads of time over building one from scratch every time. You can find more about these materials at www.smooth-on.com.
▶ The arrow shown at the end is a custom, scaled-up version of my Bristow arrow (http://satelluxe.com/products/bristow).