Published On Aug 31, 2020
Sand Texture: https://amzn.to/3lzXlMG
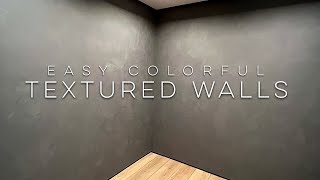
Whether you’re building a new home or remodeling an older home one of the many decisions you have to make is what kind of texture you want to put on the walls. Texture can really enhance the look of your house. Just think of your drywall as a canvas to create the look you want for your home. Texturing is really easy and there are several different choices to create the look you want. Check with your local home center and choose the right texture mix for you.
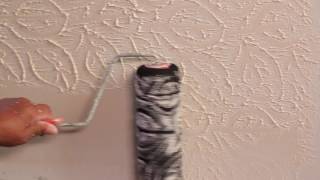
Sand Texture
As the name implies, this mix comes with sand mixed in to create this texture.
Simply put it in a paint roller pan and then use a roller to apply it.
If you want your texture to be a little finer, simply add some water to the mix. This is going to give your walls a smooth, subtle texture.
Because of the sand, the texture is raised from the wall giving you a slightly three dimensional look.
After this dries, you can simply paint it any color you want.
Smooth Texture
Again, pour out a little bit of the texture into a paint roller pan and use a roller to apply it to the wall.
The difference between this and sand texture is we’re going to use a coarse napped roller to apply this texture to the wall.
This is going to give us a different look. Cover the wall completely with the texture.
Then come back with the roller and here’s where you can get creative.
If you push down hard on the roller you can get a smooth look.
Or if you lightly drag the roller across this texture, the coarse nap of the roller pulls it up off the wall a little bit and you get a different look.
Rough Texture
Again, use a coarse napped roller to apply this texture. And it, like the others, comes pre-mixed.
Really coat the roller as you apply this to the wall and cover the entire surface.
Then take the roller and lightly pull it across the texture to pull it off the wall and create a really rough finish. This gives you a deeper, more scattered textured look.
However, it’s going to be kind of sharp after it dries. This is not a good texture to put in a child’s bedroom or playroom because brushing up against it could scratch baby soft skin.
Sponge Stippling Texture
You can use smooth texture mix for this application, but since you’re using a sponge, add some water to the texture to make it more workable.
Put some smooth texture in a roller pan, then use a sponge to apply the texture to the wall. Depending on what type of sponge you use, you can create all sorts of patterns.
The sponge creates the stippling or puckered pattern on the wall.
And the great thing about this is that if you don’t like the pattern, you can change sponges or twist and drag the sponge to create your own custom look.
Crow’s Foot
This pattern is created by buying the crow’s foot applicator. It looks like a dust mop.
Once again, use smooth texture for this application.
Dip the crow’s foot applicator into the smooth texture and then apply it to the wall.
Just keep rotating the applicator around and push against the wall as you go to get the look you want.
Once you paint it, the texture really pops!
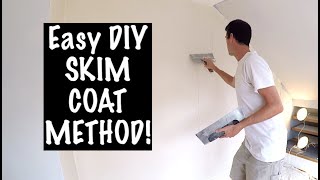
Monterrey Texture
Again, use smooth texture and a 6” drywall blade. You can also use a wider blade if you want, it just depends on your personal sense of style and what you’re trying to create.
Take the blade and scoop up some texture and apply it to the wall. You want the texture applied to be thick but not rough. Apply it to the wall in short strokes.
As you do, you’ll see little ridges pop up. This creates the relief you want on the wall and will give the wall it’s cool texture.
Once it dries, add some paint, some stain and then coat the wall with a finishing glaze and it gives you a rally expensive textured look.
Knock Down
To apply this texture you need a hopper gun, an air compressor which you can rent from a tool outlet or home center.
Once again, use smooth texture but you’ll need to add quite a bit of water to thin it out enough so it can be sprayed through the hopper.
Turn on the compressor, pull the trigger on the hopper gun and the texture is squirted or splattered on the wall.
The technique of applying this texture is called “splatter drag”.
Why? First you splatter it on the wall, holding the hopper gun 18”-24” away from the wall.
Then you let it dry for 15-20 minutes and come back with a plastic blade and drag it over the texture, this is called the “knock down”.
MORE FROM YOUR NEW HOUSE
Featured videos:
• YNH Featured Videos
Great DIY Projects from Your New House:
• DIY - Do It Yourself with Your New House
Quick Tips - easy tips to make your projects (and life) better:
• Quick Tips - Great, yet simple ideas ...
Gardening and Landscaping:
• Gardening and Landscaping
The Great Outdoors with Joe Sherinski:
• The Great Outdoors