Published On Aug 21, 2022
This will demonstrate exactly how to control Standard Stepper Motors and DC Motors with a Raspberry Pi Single-Board Computer. To do this as fast and seamlessly as possible we will utilise an Adafruit HAT and the Python Programming Language.
Full Article (with Terminal Commands) - https://core-electronics.com.au/guide...
Related Information
Set Up a Raspberry Pi as a Desktop Computer - https://core-electronics.com.au/guide...
Controlling a Solenoid With Raspberry Pi - https://core-electronics.com.au/guide...
Controlling Standard Servos With Raspberry Pi - https://core-electronics.com.au/guide...
Project Auto Tracking Camera System - https://core-electronics.com.au/proje...
How to use Raspberry Pi Imager - https://core-electronics.com.au/guide...
Use Your Phone to Control Your Raspberry Pi - https://core-electronics.com.au/tutor...
We want a fully customisable method of converting electrical energy into rotational energy (angular kinetic energy). This HAT is stackable up to 32 times. This means you can control independently up to 128 DC Motors or up to 64 Stepper Motors all through a single Raspberry Pi Single Board Computer
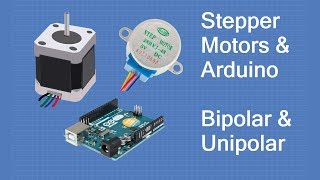
Depending on your needs either a DC motor or a Stepper Motor is going to be preferable. You might want a device that can rotate at a certain speed (RPM, revolutions per minute). In that case, a DC motor is what you would want to use. You might want a device that rotates to a precise angular position, at a very precise speed, or a set amount of rotations. In this case, a Stepper motor is what you would want to use.
DC motors are available in a huge range of sizes. You can get very tiny motors to very large industrial motors capable of many kilowatts, and everything in between. They are lightweight, reasonably efficient, and have good torque. They come in Brushless or Brushed variants. Stepper motors are DC motors that move in discrete steps. They have multiple coils that are organized in groups/phases. By energizing each phase in sequence, the stepper motor will rotate. Throw in some computer control and you can achieve very precise positioning and rotational speed control. For this reason, stepper motors are utilised in almost all precision motion control applications.
The motor controllers on this HAT are designed to run from 5V to 12V. Weird motor problems are often due to voltage mismatches so double-check your specification sheets first when it comes to troubleshooting. Most tiny 1.5V-3V Motors are not going to work or will slowly become damaged by 5V power. It is OK to run Stepper Motors at lower-than-rated voltage. They will simply carry less current and deliver less torque. Each Motor Driver on the HAT is capable of pushing out 2A.
If you have any questions about this content or want to share a project you're working on head over to our maker forum, we are full time makers and here to help - http://coreelec.io/forum
Core Electronics is located in the heart of Newcastle, Australia. We're powered by makers, for makers. Drop by if you are looking for:
Adafruit DC and Stepper Motor HAT - https://core-electronics.com.au/catal...
Adafruit DC and Stepper Motor Bonnet (Solderless Solution) - https://core-electronics.com.au/catal...
Raspberry Pi 4 Model B (4GB) Ultimate Kit Bundle (AVALIABLE!) - https://core-electronics.com.au/raspb...
Standard 5V DC Motor - https://core-electronics.com.au/catal...
Standard 12V Stepper Motor - https://core-electronics.com.au/catal...
Raspberry Pi Single Board Computers and Gear: https://core-electronics.com.au/raspb...
Stackable Headers - https://core-electronics.com.au/catal...
0:00 Intro
0:18 HAT Overview
0:56 What You Need
3:11 Soldering Hardware
3:55 Hardware Assembly
6:12 Software Installation
6:56 DC Motor Control Script
7:33 Success 1!
7:57 DC Motor Script Explanation
9:32 Stepper Motor Control Script
10:02 Success 2!
10:19 Stepper Motor Script Explanation
11:55 Where to Now
12:35 Outro