Published On Nov 6, 2021
Check Out Our FREE GUIDE: 25 Must-Have Carpentry Tools...Under $25 Each!
https://www.thehonestcarpenter.com/
AFFILIATE TOOL LINKS:
Makita Magnesium 7-1/4" Circular Saw:
https://amzn.to/3mHwv7O
Dewalt 7-1/4" Circular Saw:
https://amzn.to/3o0vvee
Dewalt Circ Saw Rip Fence:
https://amzn.to/3CNuUCT
Makita Circ Saw Rip Fence:
https://amzn.to/3wgJekP
Milwaukee Circ Saw Rip Fence:
https://amzn.to/3nQLHP6
Irwin 6" + 12" Clamps:
https://amzn.to/3o0vBT8
(These are affiliate links. When you shop through these links, we receive a small commission at NO EXTRA CHARGE TO YOU. We greatly appreciate the support!)
Be sure to visit us at THE HONEST CARPENTER WEBSITE:
www.thehonestcarpenter.com
This SIMPLE Attachment Helps You Make VERY Straight Cuts! (Circular Saw Basics #2--THE RIP FENCE)
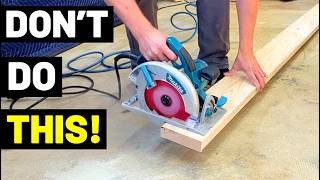
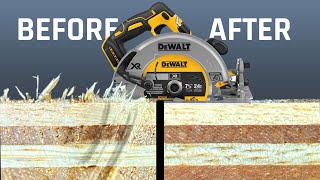
Many people struggle to make straight cuts, especially RIPS, with a circular saw. This short video from The Honest Carpenter will show you a simple attachment that helps you make rips quickly and easily!
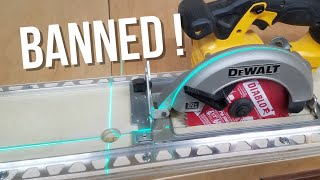
A RIP FENCE is a portable attachment for the circular saw. It acts as a guide for rip cuts.
A RIP is a cut that travels in the same direction as the grain of the board.
Rip Fences mount into slides or channels on most circular saws (though fences can vary by model, and don't always come with circular saws).
The rip fence can be adjusted, inward and outward, and can typically be used on either side of the saw.
The rip fence helps maintain a particular distance between the saw blade and the edge of a board.
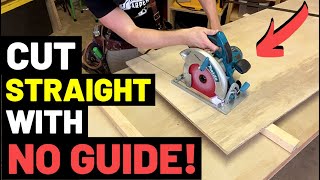
You can guide rip fences by eyes, or with a gentle touch of the fence and the board simultaneously. Or, you can exert a slight inward pull to keep the rip fence touching the edge of the board.
Because rip fences are short, and saw bodies are longer, they can produce a cantilever effect if not pushed forward evenly.
You should also place sacrificial blocks beneath your board, and clamp it into place for stability. (This may require shifting your clamps mid-cut, but only when the SAW IS NOT ACTIVE! Stop cutting and let it wind down first.)
Starting and finishing a rip cut with the rip fence is the most difficult part. You should focus on alignment the whole time, and you may want to consider scribing a line to follow.
Rip fences are no competition for table saws, which are the best ripping tool around.
But, rip fences set up quickly, and they're extremely handy on short notice or remote jobsites!
Thanks for watching!
The Honest Carpenter