Published On Feb 24, 2024
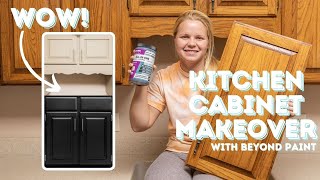
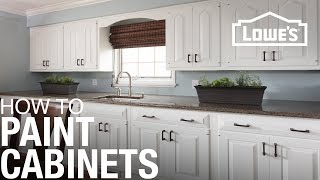
Transform your cabinets and furniture with Stone Coat Finishes - the go-to choice for DIY enthusiasts yearning for a high-quality look on a budget! Elevate your kitchen and bathroom projects with stunning luxury finishes, and effortlessly revamp your home's interior design.
Cabinet & Furniture Paint - https://bit.ly/43Zeoy0
___________________________________
Cabinet & Furniture Paint Primer
https://www.stonecoatcountertops.com/...
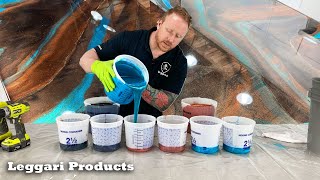
Cabinet & Furniture Paint (6 beautiful colors available!)
https://www.stonecoatcountertops.com/...
Cabinet & Furniture Paint Top Coat
https://www.stonecoatcountertops.com/...
___________________________________
Watch @RK3Designs Live Stream to see how we updated the kitchen countertop!
• Making Metallic Soapstone | DIY Kitch...
___________________________________
Why Choose Stone Coat Finishes?
- Professional Results, Simplified: Achieve a flawless finish with our self-leveling paint. Whether it's kitchen cabinets or bedroom furniture, Stone Coat Finishes provides a smooth, brushstroke-free surface that rivals professional jobs. Perfect for enhancing the beauty of your kitchen cabinets or bedroom furniture.
- Eco-Conscious and Safe: Experience a safe and eco-friendly renovation with our low VOC emissions water-based formula. Our furniture paint is non-toxic, ensuring the well-being of your family and the environment.
- Durability Meets Style: Stone Coat Finishes offers durable solutions that stand the test of time. Our scratch-resistant, high-adhesion paint ensures long-lasting elegance for your cabinets and furniture.
- Versatility at Its Best: Achieve your desired aesthetic, be it modern or antique, with our versatile paint. Designed for various surfaces and styles, our paint offers a wide range of finishes from satin to gloss. Personalize your space using our extensive palette of custom colors.
- DIY-Friendly Application: Bid farewell to time-consuming prep work! Experience the convenience of our fast-drying, easy-to-apply formula that requires very minimal sanding. Perfect for those looking to upcycle furniture or refinish kitchen cabinets.
___________________________________
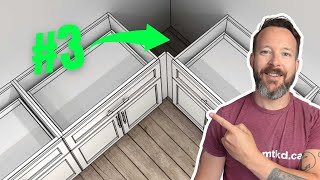
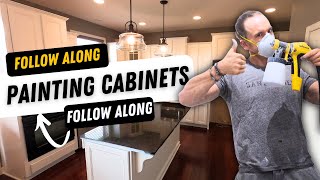
0:00 - DIY Cabinet Paint how to intro
0:18 - How to clean cabinets
1:51 - How to sand cabinets to prep for primer
3:28 - How to apply a primer to cabinets
5:28 - Stone Coat Finishes - Applying DIY Cabinet Paint
7:19 - Questions on our Cabinet & Furniture Paint?
8:20 - Pro Tips on painting your cabinets
9:28 - How to re-install cabinets
10:08 - Final results of updating old cabinets with paint
___________________________________
QUICK GUIDE INSTRUCTIONS:
PREPARATION
Prepare the surface for Cabinet & Furniture Top Coat (optional step). If needed, lightly hand sand the previous coat of Primer using 220 grit sandpaper or a maroon or green Scotch-Brite pad. Ensure the Paint Color is dry before sanding and wipe away dust with a cloth. This will eliminate imperfections or contaminants from the previous step. If the surface is smooth, you can skip sanding the primer before applying the Base Paint.
APPLICATION
Methods of Application: Brush, Roller, or Paint Sprayer.
Sir thoroughly before use with a paint stick. Apply 1-2 uniform coats of Cabinet & Furniture Paint in your color choice as needed for coverage. Allow the first coat to fully dry 2-3 hours before the second coat if needed. Lightly hand sand the previous coat using 220 grit sandpaper or a maroon Scotch-Brite pad to eliminate imperfections or contaminates.
APPLICATION PROCESS:
For applying paint color to routed or 3D details of a cabinet door or the intricate perimeter of a cabinet drawer, and the sharp corners of the face frame, utilize an angled nylon paint brush. Keep from overloading the fine details with paint. See our tutorial on our YouTube channel for detailed video instruction. You Got This!
Use a ⅛’’ Nap Microfiber roller to apply Paint Color to the flat sections of the cabinet doors, drawers, and face frames. Use your roller length of choice, 4’’, 6’’ or 9’’
CLEAN UP
Remove all paint splatters and drips.. Wash all brushes, rollers, and equipment immediately with warm water, use dish soap if desired.
___________________________________
🏠Join our Community of 85,000+ members!🏠
/ sccinsiders
Follow us on Instagram where we share wonderful projects from around the country!
/ stonecoatcountertop
Watch to see how we transformed this Kitchen!
• How to make White Kitchen Countertops...
Want to learn more about Epoxy Flooring? Check this video out.
• How to Epoxy Concrete Floors with Fla...
___________________________________
#StoneCoatCountertops #epoxy #YouGotThis #resin