Published On Oct 19, 2023
www.protradecraft.com | SUBSCRIBE, please!
/ @protradecraft
the source: www.protradecraft.com/simple-deck-ledger-installation-basic-deck-framing-14
The first part of building a deck is setting the ledger against the wall so that the posts and beams can be installed and more wood can get cut.
This deck is a simple inside corner on new construction with ZIP sheathing WRB. The ledger is not spaced off the wall; it is flashed tightly into the wall.
The siding layout took the deck height into consideration, but when installing that inside corner board, Ben didn’t want to gamble, so he ran it long.
With the corner out of the way, Ben and Rick turn to tuck the flashing behind the siding. The starter strip is sealed at the top with ZIP tape, so it also acts as a base flashing that kicks water out from the wall. This ledger flashing tucks behind that. For walls with regular house wrap, just make sure the ledger flashing tucks behind the house wrap.
They adjust the ledger flashing with a special flashing adjustment tool set, and then they slip the ledger into place, nailing it with a nail gun to temporarily hold it still.
As they install the ledger, they keep the top of it flush—because not all pressure-treated lumber is the same dimension. In fact, none of it is.
With the ledger in place, they snap lines for the bolt zone:
"We have to be a minimum of two inches from the top and a minimum of 5-12/ inches between the top and bottom row, and on this deck, we have to be a maximum of 18 inches. The lag bolts will be staggered up and down every 16 inches. The maximum spacing is 18-inch spacing, but we’re running 16-inch spacing here because lays out nicely."
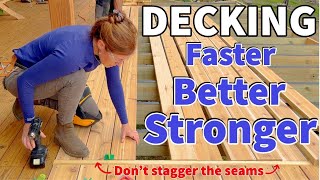
Rick sets a nail at the first joist spot and pulls the joist layout every 16 inches down the ledger. On the way back, he marks the edge and indicates the joist placement with an X.
Ben works back again, marking the bolt layout—neatly placed between the joists. Finally, he screws in the structural lag screws—staggered up and down between each joist and two at the ends.
Instagram: www.instagram.com/protradecraft
Facebook: / protradecraft
Twitter: @TradeCraftsman | twitter.com/tradecraftsman
Pinterest: @ProTradeCraft | pinterest.com/ProTradeCraft
Subscribe to ProTradeCraft's YouTube channel for regular updates