Published On Feb 22, 2023
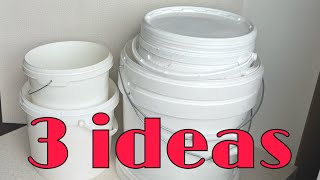
Let's run on down to Walmart to grab your favorite inexpensive bucket!
Start by getting those handles off, we don't need those! Take them off both sides, they clip right off. Next, we're going to take that bucket and flip it over. We need to set in two strips of wood that are gonna fit right on the edge. Just go ahead and set it down there, no need for a tape measure and just mark it with a pencil.
What you're going to need is definitely two of these, just use your favorite saw, it's easy to do! Next, stack them on there and make sure they fit just right inside the grooves. Then, you can use some hot glue just three good dabs on the edge we'll do it. Just flip it over and press it against the plastic. Now I know what you're thinking, this glue does not hold permanently. That's okay! We just needed to hold until we can flip it back over so do that to both pieces right on the edge and just hold it down till it sets (takes about 20 seconds). Next, flip the bucket over and what you're going to do is grab just some small little screws, they don't need to be long, we don't want them to pop out through the end of the wood, so just take your drill and put it right in two or three in each strip of wood will be just right. Just put it in there and don't over-tighten -that's going to hold it in place.
Now it's time to put on the wheels. I got these little inexpensive caster wheels, but I need the drill bit to be just the right size and we're going to mark it one inch from each side of the wood. We're going to put four of these legs on, so once you get them marked let's go ahead and we're going to drill it. You can just drill all the way through the plastic, it's not going to be a problem because when we set the leg in it's going to block the hole so these little wheels are perfect. Now it's time to take that hot glue, put it right on the edge of the hole there and put the leg on. It's going to hold it just great.
If you don't want to use hot glue and you want a little different glue, go ahead it'll work. Also just let it set up, I like using hot glue because it's fast. Once we get the legs in, look at this! They are excellent, exactly what we need now it's time to go ahead and decorate the bucket. I grabbed this twine over at Dollar Tree. Just take again our favorite hot glue, put it right on the edge, this is our starter piece, just stick it right on there you want to make sure this first row is perfect. I use the edge of this bucket right on this line and that's going to be what I call my datum line. Just go ahead and set it all the way around and we're going to go around the whole bucket. Once you get that on it's time to take a little bit of your inexpensive fabric, cut about 12 inches wide we're going to use that hot glue again and we're going to fold over the edge that's going to give us a nice edge.
To finish this off, what I did was I just worked my way down with that hot glue and kept folding it over, be careful because it can get a little hot. Once we get both edges nice and done, what we're going to do is fold it over the bucket. It's going to cover all that plastic. Get that glue right on that last bit of rope right there, spread it over and just mark it down right there. We're going to take this all the way around the bucket.
Look at this! This is going to be a great container. We can store books, dog toys, or even toys for the grandkids - it turned out great! I hoped you loved this DIY rolling basket.
Thanks for watching Hometalk and we'll see you next time!
Hometalk | Ideas you can do.
Get our daily email for endless DIY ideas: https://ht.hmtlk.com/l/4VfU
FACEBOOK → / hometalk
INSTAGRAM → / hometalk
PINTEREST → / hometalk
TIKTOK → https://vm.tiktok.com/ne4T87
#Hometalk #DIY #homehacks #lifehacks