Published On Feb 2, 2018
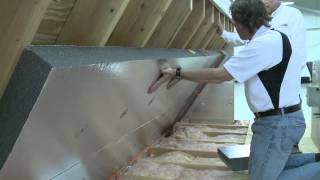
- [Narrator] Congratulations on your purchase of a QuietCool Whole House Fan. Installation is a breeze and you'll be astounded by how much you'll love your QuietCool. To begin installation, first you'll need to gather your tools. To install QuietCool, you'll need the following tools. Open up your QuietCool box and take out all of the included components. Make sure you have everything you need for installation. Read through the owner's manual before installation to ensure you understand all the of the steps and requirements for the installation. Now, let's figure out the best location to install your fan. If you purchased a larger fan unit for your entire home, you'll want to install the fan centrally located in the home, such as above your stairs or in a hallway. You'll want to open a window across the living space to draw air across your home. If you purchased a smaller fan unit for a bedroom, you'll want to install the fan right above the bedroom door or in your master bathroom. You'll want to open a window across the bedroom to draw air through the entire bedroom. Before starting installation, make sure to spin the fan blade to make sure it spins freely. Remember to find a location with a minimum of 30 inches of clearance height to hang your QuietCool Fan in the attic. Once you have found the location to install your fan, head to the attic to ensure there is no obstructions that may block the fan. Make sure to pull back any insulation around where the ceiling cutout will be. Using your awl, mark four reference holes in the drywall around the template. Head back downstairs and use your template to match the four reference holes and mark around the template with a pencil. Remove your template and then use your drywall saw to cut around the marked edges. If your attic is hard to maneuver through, now would be a great time to the duct off the QuietCool motorhead and pass the motorhead and duct through the ceiling cutout. We designed the housing to fit through the cutout opening. Your damper box has removable flanges designed to fit 16 inches or 24 inches on center joists. If your attic rafters are 16 inches on center, you're going to need to remove both of the damper box flanges that are on the same side as the ceiling joist for an easy fit. If your attic rafters are 24 inches on center, you're going to need to remove one damper box flange on the side that will mount to the ceiling joists. The flanges are very simple to remove with a flathead screwdriver. Next, place your damper box over the ceiling cutout. For both 16 inches and 24 inches on center installation, you need to attach the damper box to one or more sides of the joists. Fasten the damper box to the joist using the preexisting holes inside of the damper box located under the dampers. On the opposite sides, use a drywall screw to screw through the drywall into the metal flange. The flange on the other side, is designed to fasten and secure the damper box. Next, install your ceiling grille. With the included white Philips screws, finish the installation. These screws will penetrate the flange on the damper box to hold it in place. Next, head back to the attic. If you removed the duct from the motor housing, you'll now want to reattach it. Using our innovative hanger strap eyelet holes, hanging the fan is a breeze. Simply install two screws into the joist you'll be hanging the fan from and screw them in almost all the way. Hang the straps onto the screw heads and tighten the screws. Make sure the motorhead is within three to six feet from the damper box. If you don't have a rafter close enough to secure the fan, you can always construct your own rafter closer to the fan. Remember to hang the motor housing slightly tilted towards the roof to avoid possible movement of blown-in insulation around your attic. Attach your duct to the damper box with the three black sharp screws provided in the accessory bag. Then, using the included nylon strapping in the accessory bag, wrap the strap around the duct and make a rough 90-degree bend on the duct. This will keep the fan from moving and help reduce vibration and noise. Check that the fan blade spins freely. Always check your local building codes when installing appliances. Congratulations. Your QuietCool system is hung and ready to be wired.
For more information please visit our website at https://QuietCoolSystems.com
For the latest news and updates from us please follow us on our Socials:
Facebook: / qcmanufacturing
Instagram: / qcmanufacturing
Twitter: / qcmanufacturing