Published On Sep 3, 2022
How To PROPERLY Flush and Recharge A Contaminated AC System. In this video we are going to take a look at what it takes to clean out a contaminated A/C system. The vehicle in this video had too much oil in the system causing the high side pressures in the system to be extremely high and the low side pressures to be extremely low. The vehicle in this video was actually venting pressure out the pressure relief because the high side pressure was so high due to the amount of oil in the system. The only way to ensure the proper amount of oil is in the system is to flush out all the old oil and add the correct amount.
Proper AC system flushing requires nearly complete disassembly of the ac system. Flushing solvent needs to be ran though all the lines and the evaporator until the flushing solvent comes out clear. Things that should not be flushed are the: Compressor, Condenser, Orifice Tube or Expansion Valve, any line with a muffler, and the Receiver Dryer/Accumulator.
Tools used in this video:
Aerosol Flushing Solvent (at the minimum you'll need 2 cans): https://amzn.to/3CHaazN
Professional Style Flushing Canister: https://amzn.to/3AfnVCD
Flushing Solvent for Professional Canister: https://amzn.to/3dMGpTy
PAG 46 Oil w/UV Dye: https://amzn.to/3AGIIk4
PAG 100 Oil w/UV Dye: https://amzn.to/3pDHVdp
PAG 150 Oil w/UV Dye: https://amzn.to/3dEstLc
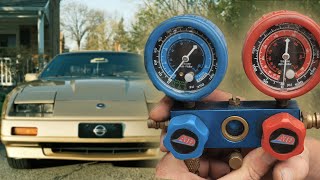
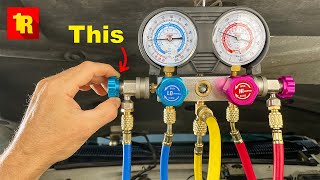
R134A Manifold Gauge Set & Vacuum Pump Kit: https://amzn.to/3AFHmWI
R134A & 1234YF Manifold Gauges: https://amzn.to/3T9LlCb
Vacuum Pump: https://amzn.to/3A8YgM0
Can Tap:https://amzn.to/3T7is9I
R134A Refrigerant: https://amzn.to/3dDPluj
1234YF Refrigerant: https://amzn.to/3KiejvO
My Amazon Store: https://www.amazon.com/shop/repairgeek
Help support the channel, buy using my Amazon links
As an Amazon Associate I earn from qualifying purchases and your cost is exactly the same.
Oil type and quantity information: supercool.ac
Questions? Shoot me an email at [email protected]
00:00 Intro
00:03 Why you would need to flush an A/C system
00:42 Why I'm flushing my A/C system
2:22 Establish what direction the refrigerant flows in.
3:30 A/C System disassembly
4:41 How to flush the A/C components
6:43 The components you CAN'T flush
11:04 Flushing my system
12:42 What A/C oil do you need?
15:09 System reassembly
15:26 How to charge the system with oil after it was flushed
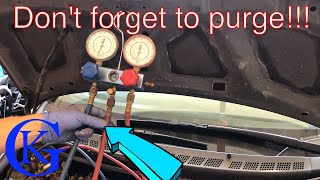
19:11 Pulling a Vacuum on the A/C system
23:35 Refrigerant selection
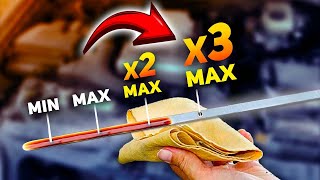
25:55 Charging the air conditioning with refrigerant
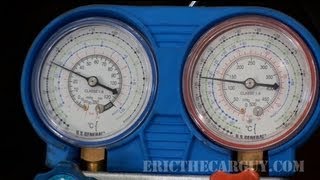
27:47 Final manifold gauge readings
28:43 Vent temperature readings
29:22 Thanks for watching!
#acrepair #airconditioning #airconditioner
Disclaimer:
The information, demonstration and any content contained in this video is for informational purposes only. The user Repair Geek makes no warranty, express or implied, regarding the effectiveness or safety of the contents of this video. In no way should the contents of the video, including the tools used, be repeated or tried by anyone. Viewers should only seek the help of a trained professional located at a licensed auto repair shop for any fix, modification, alteration, or any change to their vehicle. Repair Geek shall not be liable for any injury, damage, or loss to any person or property that may result from use of the tools, equipment, or any content contained in this video. In addition, there is no way to guarantee that the video is not altered or modified or is not in the final form submitted by Repair Geek and therefore, Repair Geek does not warrant that the video is unaltered or not modified. The links on this video to products are for informational purposes only and in no way are an endorsement of the safety or effectiveness of the particular product. Viewers understand that anything contained in this video or linked to or from this video is the sole responsibility of the viewer and in no way provides an express or implied warranty as to the safety or effectiveness of any linked tool, product, or video. Therefore, viewer agrees to release, waive, and discharge Repair Geek or anyone affiliated with Repair Geek, from any and all liability, claims, demands, actions, and causes of action whatsoever arising out of or related to any loss, damage, or injury, including death, that may be sustained by the viewer, or to any property belonging to viewer, regardless of whether the loss is linked to the use of the contents of this video, or otherwise and regardless of whether such liability arises in tort, contract, strict liability, or otherwise, to the fullest extent allowed by law.