Published On Nov 28, 2020
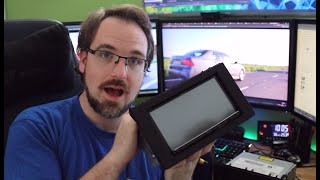
Due to radio issue in my 08 Cobalt ive decided to swap it out with a Carplay radio which I use in the wife's Jetta and find to be pretty cool. I didn't want to drop too much cash on a rig and happened to find what is the cheapest carplay ready radio on Amazon, obviously this is a risk, but well have some fun.
Updated version with remote Microphone below
https://amzn.to/3WkZE96
This one now has an external microphone....man, i wish mine did...
GM2500B Compatible with Select 2005-Up GM ISO Double DIN
https://amzn.to/3mXRKF5
Starting off the company requests the radio be tested after unpacking in case its broken, not a good sign. I use the heathkit on the bench to accomplish this. Ugliest bootlogo one could hope for...
Starting the wiring, I happen to already have the requisite GM13SR box to replace the factory unit. It needs to be wired into after market radios. With a minimum setup, I remove the dash trin to gain access to the old radio and remove it. Testing the new harness we get the radio up and running for a moment to determine that my front speakers also don't work with the new radio. Another issue for another video.
The mounting kit I picked up does not accommodate the mounting plate, and the cobalt ones seem to have the same issue, so I decided the inlet the radio by hand. Tedious, but it worked. While everything was out I revisited the harness to add the camera and illumination connections.
With everything back in the car cable is now pulled through the dash to the center console. Not having success with the antenna converter I brought the radio to Walmart to match it up. Now, all connections are plugged into the radio from the harness, a full test is accomplished.
Back at the bench, the radio, didn't come with screws for this price so I went to Ace to pick up screws and then with a dremel , modified the mount to accommodate the camber. This allowed for a full dash mounting, shimming and final mounting. With a good fit, all of the trim is re-attached up front.
The rear seats are removed by way of the removal tabs, again pulling the camera cable towards the back of the car, dressing it into the harness into the trunk. Continuing through the harness towards the passenger tail light a grommet receives a cable for 12 volts off the reverse lamp wire which will make its way to the reverse harness.
A small hole is made in the trunk allowing the camera to be run to the license plate area wiring and dressed around the battery area.
#cobalt #chevycobalt #carplay