Published On Jan 17, 2020
Install Raid for Free ✅ Mobile: https://clcr.me/FgR8TQ ✅ PC: https://clcr.me/iCqSNt Start with💰50K silver and get a Free Epic Champion 💥 on day 7 of “New Player Rewards” program
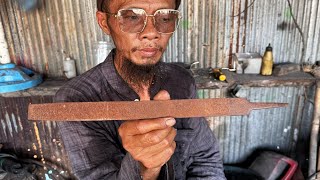
Yes! Another knife restoration. I love making this kind of projects!
This rusty old knife came from a recent visit to my town sunday flea market, needless to say I paid pretty much nothing for this. I guess it's no surprise, not many would buy something in this condition right?! But I knew it had potential. Under rust, dust and bad welds the steel is nice and hard! (between 50 and 55 Rhc) We can even see a hint of a makers mark, unfortunatly incomplete, so I am not able to discover when and where it was made and for what specific use. Still cool!
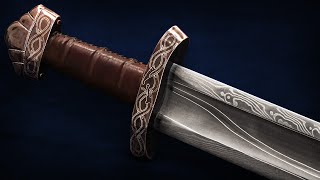
For the handle I used: stainless steel, ebony wood, white felt liners, stabilized cork and stabilized curly maple (I think it's maple, not sure).
I just started to list some of the stuff I use for my projects in this amazon storefront:
https://www.amazon.com/shop/blackbear...
It's affiliate marketing, so if you order something from here you'll help the channel for free! Thank you!
Here are some of the videos where I go in more details about tecniques and tools used in this video:
Stabilizing wood: • Stabilizing Wood With DIY Vacuum Pump
Vacuum pump and chamber used to stabilize: • DIY Vacuum Pump And Chamber
Felt liners: • Felt And Resin Liner / Spacers DIY
Stabilized cork: • Cork Stabilization IKEA Pot Stand
My lovely drill press: • ROSA Drill Press Restoration | The Be...
My lovely buffer: • 1950s Italian Bench Grinder / Buffer ...
Ind ex of operation and materials:
0:30 Weak welds, easy to break loose
0:54 Electrolysis: water and sodium carbonate solution, parts connected to negative side and steel sacrificial anodes to positive sice of a DC power supply (car battery charger). 2-3 hrs at 5amp.
1:17 Remove patina with steel wire brush in water
3:16 Cut off disk on angle grinder to remove ugly welded tang extension
5:05 Remove rust and patina with steel wire wheel on bench grinder
5:17 Fill old pin holes with stick weld
6:12 Transfer design with paper template, small magnets and random spray paint
6:31 Re-shape on 2x72 belt grinder, edge kept cool with water bucket
7:18 Round cornes with die grinder and stone bits
7:40 Grind new bevels on 2x72 belt grinder, edge kept cool with water bucket
8:00 Hand sand to 600grit sandpaper
8:20 Etch in ferric chloride
8:30 Satin finish with fine steel whool
9:06 Notch onthe tang for glue to grab later on
9:50 Cut materials for handle stack
10:16 Grind faces flat
10:46 Glueing the handle stack with 5 min epoxy resin
11:19 Grind square
11:38 Drill tang hole, 10mm in diameter
12:17 Mark and center puch guard holes
12:40 Drilling with 3 mm bit
13:06 Grinding back side with dremel to save some file work
13:38 Filing to size
14:05 Tang dowel took to the exact diameter by spinning on a plate with hole drilled with same bit as the tang hole
14:20 Splitting the dowel
14:32 Enlarge the slot to match the tang thickness on slack of 2x72 belt grinder
15:00 Final glue up with slow setting epoxy glue
16:00 Squeezout cleaned with nitro solvent
16:18 Grinding handle to shape on 2x72 belt grinder
17:00 Hand sanding up to 600 grit
17:34 Boiled linseed oil as finish
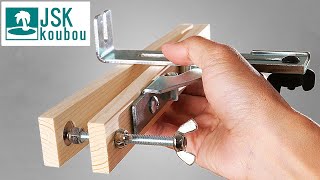
17:54 Sharpen with MadEdge sharpener
18:23 Strop on leather with fine polishing coumpound
Thanks a lot for watching, I hope you liked the video!
Suggestions and comments are welcome.
Leave a like and share to anyone who might be interested!
★Patreon★
/ blackbeardprojects
★Website★
http://blackbeardproject.com/
★Follow me★
Facebook ► / blackbeardprojects
Twitter ► / blackbeardproje
Instagram ► / black_beard_projects