Published On Oct 9, 2022
HAVE you SEEN this whole series?
Link to the PLAYLIST so you can watch ALL of the videos on The Salvage Cave Rebuild:
• RESTORING an OLD Shop ~ The Salvage CAVE
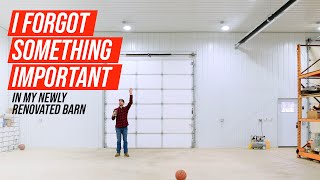
Siding, plywood, and electrical- oh my! Once the roof was on, it was time to get started on the inside and put up new siding on the front of the building. The former electrical set up was shoddy at best, so it was important to bring it up to code, and make it safe!
We did a TO of work finishing the interior, insulating, and making this shop a usable place once again! The goal was NOT to finish the inside to PERFECT condition, the goal was to make it a clean usable place so the mechanic who WAS using the building could get back to work, so that's what we did!
I didn't have to opportunity to use the shop for Salvage Workshop until MANY months later, so if you have been enjoying this content, have no fear, this series will continue later when I show you some of the additional upgrades and repairs I have had to complete on the building since I started using it! For now though, the Salvage Cave is ready to be used!
I hope you enjoy the video, and I look forward to hearing from you in the comments!
As ALWAYS, Thanks for Watching!
~
This building used to be a car repair shop. The extra space and room has been nice, but before I could use this shop as another workshop for the channel, a LOT of work needed to be done, including a new roof, better lighting, and much more! I have restored a variety of old tools and machines on the channel; now, it's time to restore an old shop. I spent the winter on this construction project, and I hope you'll enjoy following along. Join me on another adventure as I take an old, beat up shop and transform it into The Salvage Cave.
~
0:00 - Introduction/Previously on Salvage Workshop...
1:28 - Rewiring the entire shop
3:49 - Cutting out part of the wall with a chainsaw
4:45 - Framing the inside wall
7:30 - Bringing in the new plywood
8:00 - Putting the plywood up inside of the shop
12:23 - Next up is insulation and drywall
15:48 - Wiring the new electrical panel
16:49 - Installing new light switches right next to the man door
25:23 - Turning on the new lights in the shop... and God said, "Let there be light!"
26:44 - Testing out the car lift with the new roof height/bringing in the Jeep
31:36 - The progress/an update on the outside of the building
32:58 - What the middle of the shop looks like
33:35 - An overview of the changes made on the inside of the shop
35:55 - Putting the new steel siding on the front of the building
40:00 - The siding on the front of the building is complete!
41:08 - The outside of the Cave at nighttime
~
If you have any suggestions, questions, or comments, please leave them below!
Thanks for stopping by, I truly appreciate your support!
Follow my Instagram for what else I'm up to!
★Instagram★ / salvageworkshop
#ShopRestoration #TheSalvageCave #SalvageWorkshopOnSite