Published On Apr 29, 2023
HAVE you SEEN this whole series?
Link to the PLAYLIST so you can watch ALL of the videos on The Salvage Cave Rebuild:
• RESTORING an OLD Shop ~ The Salvage CAVE
~
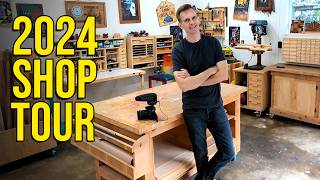
Now that the MAJOR remodeling is FINALLY done, it's time to turn my attention to making this shop FIT Salvage Workshop!
We are going to create one of the most unique shop work spaces you'll ever see, and the transformation from white walls to rustic is INCREDIBLE!
Just about ALL the materials used throughout the decorations / wall coverings here at at the cave were SALVAGED and repurposed!
I wanted to create a space that fit the channel and an amazing place to work and create content for you moving forward! I think we achieved that goal, but I'd love to know what you think!
As always, I hope you enjoy the video, and I look forward to hearing from you in the comments!
Thanks for Watching!
~
0:00 - Preparing for the Pallet Wall at the Cave
1:49 - Painting the Electrical boxes in Hammered Cooper
2:32 - Cutting apart Pallets
3:29 - Installing Tar Paper on the Walls
5:30 - Installing Maroon Sheet metal along the Bottom of the Wall
6:21 - Installing the Pallet Wall
11:59 - Peeling Plastic from the Maroon Sheet Metal
15:11 - Installing the Lower Wall Covering along the Bottom of the Back Wall
20:33 - Painting Concrete Screws
22:10 - Back to Installing the Metal Along the Back Wall
23:38 - Installing Tar Paper along the Back Wall
27:01 - Installing the Chair Rail Along the Back Wall
28:59 - Installing Rusty Metal & Pallet Wall Sections Along the Back Wall
40:36 - Creating the Broken Brick / Mortar effect with Pallet Boards
47:14 - Replacing the Outlets
51:05 - Installing the Lower Metal & Chair Rail Along the Side Wall
53:51 - Staining & Poly the Plywood that will Cover the Wall
54:46 - Covering the Far Wall in the Cave
57:04 - A Quick Update and Walk Around to Show Where we're at!
1:00:54 - Removing Tension from the Garage Door Springs
1:03:22 - Installing Rusty Metal Above the Garage Doors
1:05:16 - Installing Additional Metal Braces to Hold up the Mr. Cool Outdoor Unit
1:06:05 - Finishing the Step Near the Back Door
1:16:38 - Moving the Work Benches into Place
1:20:00 - Final Walk Around Throughout the Cave
1:24:00 - Thanks for Watching! Lot's MORE to Come!
~
If you have any suggestions, questions, or comments, please leave them below!
Thanks for stopping by, I truly appreciate your support!
Follow my Instagram for what else I'm up to!
★Instagram★ / salvageworkshop
#ShopRescue #TheSalvageCave #SalvageWorkshopOnSite