Published On Sep 23, 2020
Tools used:
BLACK & DECKER 12V Power Drill (with bits that fit chosen screws and a 1” flat wood bit).
CRAFTSMAN 13.0 AMP 7 1/4” Corded Circular Saw
Wood Rasp
Rounded Wood File
PORTLAND SAW 6” Coping Saw w/ High Carbon Steel Blade
WARRIOR Angled Sanding Sponges (150 Grit/Fine)
(4) PITTSBURGH 24” Quick Release Bar Clamps
Materials needed:
(2) Panels of Sanded Plywood
POWERPRO 8 x ¾” T20 Interior Multi-Material Screws
POWERPRO 8 x 1 ½” Exterior Multi-Material Screws
(4) 3” Brass Hinges
(16) ZMAX Large L Angle Brackets
(1) Roll of NEEDLEBOND Interior/Exterior carpet
(1) LOCTITE Spray Adhesive Glue
(1) GORILLA Wood Glue
(2) Slings, Straps or Rope for Front Panels
Measurements:
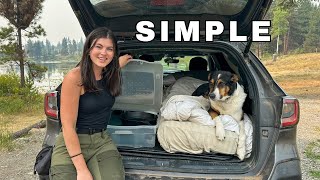
Below were our initial plywood measurements but as you saw we made some adjustments with the curved cuts and sanding on the back support panels. The below measurements should be adjusted to your specific make/model of SUV. The back of my 2018 Subaru Forester is not level which is why the support panels are various heights.
(1) 31.5” x 42” (Back Top Plywood Panel and Carpet)
(1) 26.5” x 42” (Middle Top Plywood Panel and Carpet)
(2) 16” x 21” (Both Front Top Plywood Panels and Carpets)
(3) 9” x 31.5” (Back Support Panels – these were then cut at an angle - 8.5” on one end and 7.5” on the other. They were then rounded and sanded as shown in the video.)
(1) 5” x 42” (Middle Support Panel)
(1) 5.5” x 42” (Middle Support Panel)
Special Thanks:
Bed Platform design inspired by “Ruby Sue the Subaru” blog post at www.bonjourbecky.com.
Music by:
Johnusworld – Music for Video Creators
/ @nocopyrightmusic-copyrightfree
Follow our adventures on Instagram @rachelmorgan173 !!
Stay tuned for Part 2: Accessorizing Your SUV Camper !!