Published On May 20, 2023
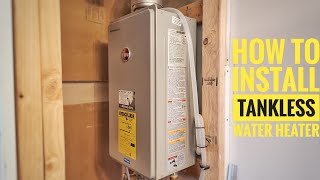
Hey Everyone! Check out this informative video where we guide you through the installation process of a tankless water heater inside a real customers home. We address various factors to consider when installing a tankless system, such as intake and exhaust piping, electrical power supply, drain line, water line, and gas line. we had to remove the old water heater to make room for the new tankless unit before we filmed this video. By opting for a tankless water heater, we not only reduce operating costs but also provide endless hot water for our customers’ home.
During this installation, we faced a unique challenge of having half the wall made of concrete and half made of wood. We measured and mounted the tankless water heater where we wanted it. To ensure proper installation, we secured the unit with brackets and made necessary connections. The cold water runs down from the ceiling, replacing the old hot water line, and enters the tankless unit through the cold inlet isolation valve. The unit utilizes 95% of the heat it generates to heat the water. The plastic flue piping is used to handle the condensation formed during the heating process, which is a sign of maximum efficiency.
We go over how we adapt the piping material to match the existing plumbing inside the house. If the house primarily uses copper or PEX piping, we try to maintain consistency. For aesthetic reasons, we prefer using white PEX piping. Inside the tankless unit, a complex system of parts work together to transform cold water into hot water. The temperature is set to 120 degrees Fahrenheit, ensuring a comfortable water supply to faucets and fixtures.
One of the connections made was the gas line. That connection was made using a negative pressure gas valve, allowing us to utilize half-inch gas piping instead of the typical three-quarter inch. A pressure relief valve ensures safety in case of excessive heat or pressure build-up. The condensation created by the high-efficiency unit is directed to a floor drain which was thankfully pretty close to where we were working. We took precautions by using zip ties instead of screws to secure brackets, preventing rust and damage over time and we think it just looks better
Next was the electrical power supply, we repurposed the furnace service switch into a switch-outlet combination, providing a good connection for the tankless water heater. We emphasize the importance of leaving a loop between the appliance and the outlet to prevent water from reaching the electrical components. Water and electricity don’t mix very well lol 😆!
So, Tankless water heaters have a sealed combustion system, where fresh air is drawn from outdoors and exhaust is pushed outside. The intake and exhaust pipes navigate through the basement, ensuring nice operation and increased overall efficiency of the home. We explain the installation of two-inch PVC piping and the addition of turn-down fittings to prevent rainwater from entering.
Throughout the video, you'll witness our expertise, problem-solving skills, and attention to detail. Join us on this installation journey as we navigate challenges, make necessary connections, and successfully install the tankless water heater. Stay tuned for more informative content and don't forget to like, comment, and subscribe! As well bring you plumbing videos in a way you’ve never seen before!
For more great info, check out our other videos on this channel or visit our webpage at www.CallSmedley.com