Published On Jan 21, 2017
If you'd like to donate to our channel, please do so here: https://paypal.me/dobbsworkshop
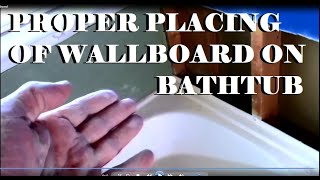
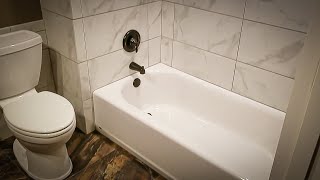
This video will show you how to set tile around a tub. I cover some of the specifics of how to layout and set up a tub to install tile around it.
I'm using thin set as my adhesive for the tile. When installing tile on walls, always remember that you want to create level lines to install your tile on. If you remember that one thing, you're well on your way to having a good looking final installation.
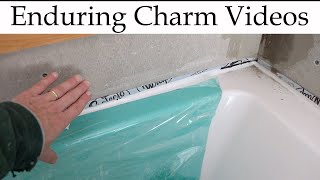
Now, the tub is not necessarily going to be level. It will also have places where it may have a ridge that turns up underneath the wallboard. So, start by finding the lowest point where the tile will be installed against the tub and you can do that with a level.
At that spot, take a full piece of tile and place it against the wall and make a mark on the top of the tile. It is at or below that mark that you want to draw a level line all the way around the 3 sides of the tub.
You are shooting for about 1/8 of an inch gap between your tub and the first row of tile. This gives you a good joint for caulk that will be applied in the corner later.
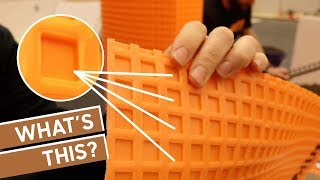
There are many factors such as bows in the wall and slight variations in the size of tiles that can start causing your tiles to get off-line. So, use your spacers to help keep your tile on track. I also continue to add level reference lines as I move up the wall until I get near the top of the tile installation.
In order to keep tile aligned in the corners, make sure to install all 3 walls of tile as you move up. Don't make the mistake of installing 6 feet of tile up one wall and then coming back and trying to line up another 6 foot section of wall with the first.
In many installations like this, you will see that the edge of the tile is left square and grout is applied between the wall and the edge of the tile to build out a grout joint that just rests against the edge of the tile. Over time and, in fact. in a relatively short period of time this grout will crack and begin falling off.
In cases like this, I back cut the edge of the tile which means I'm cutting about a 45° angle off the exposed edge in order to create an area to pack grout into. By taking masking tape and applying it to the wall next to the tile you can tightly pack grout into that space and after washing it down, remove the tape and get a very defined grout joint that will also have good durability.
Grouting is grouting, and is not one of my favorite parts of the job although it is one of the most important. You mix grout to allow it to be easily worked into the joints. In most cases, that's about the consistency of a half melted bowl of ice cream.
Different types of tile will soak up the moisture in the grout at different speeds. So, you need to experiment a little bit with your tile in order to get the mixture that works best. About five minutes after grouting an area, you should be able to come back and wash down the joints to see that the grout is beginning to firm up in the joints.
I don't worry about the corners too much when applying grout. I'm ultimately going to come back with a matching sanded or un-sanded caulk depending on the installation and apply that in the corners.
The flexibility of the caulk will keep the corners sealed when there is movement between the two walls at the corner. Grout in place of caulk in the corners will always crack and not provide a waterproof seal in the corner over the long-term.
The secret to caulking is to not get more caulk into the corners than you need. This means that when you cut the tip off of the tube of caulk, start with a small hole maybe the size of the matchstick. Then depending on how firmly you are squeezing the caulk gun adjust the speed of your movement to leave a consistent bead of caulk in the corner.
When installing accessories like soap dishes, mix really stiff thin set and apply it to the back of the dish. There may be holes in the back and you want to make sure to squeeze some thin set into those holes.
Then press the dish into the slot cut out in the tile and push it in until it is begins to come in contact with the surface of the tile. Take a sponge and your finger again much like when you're caulking and remove the excess thin set that is squeezing out.